
Cake Stands to Elevate Any Style
[et_pb_section][et_pb_row][et_pb_column type=”4_4″][et_pb_text]
How To: Craft multiple cake stands for any occasion, any style
Whether centerpiece, full buffet or a dessert spread, adding height is a surefire way of adding pizazz. Cake plates of varying heights and sizes act as stages for the stars of your show.
And it’s even a better show when the cake plates help set the mood, establish the theme.
For my “Take & Make” article in the Spring 2013 issue of DIY wedding magazine, I crafted three different versions of cake plates all using paper mache box lids from craft stores. The lids are elevated on urns, vases or candlesticks. BONUS: So much easier to store than traditional cake plates and tiered stands – just nest the boxes and lids inside each other!
Vintage Romance? Rustic Elegance?
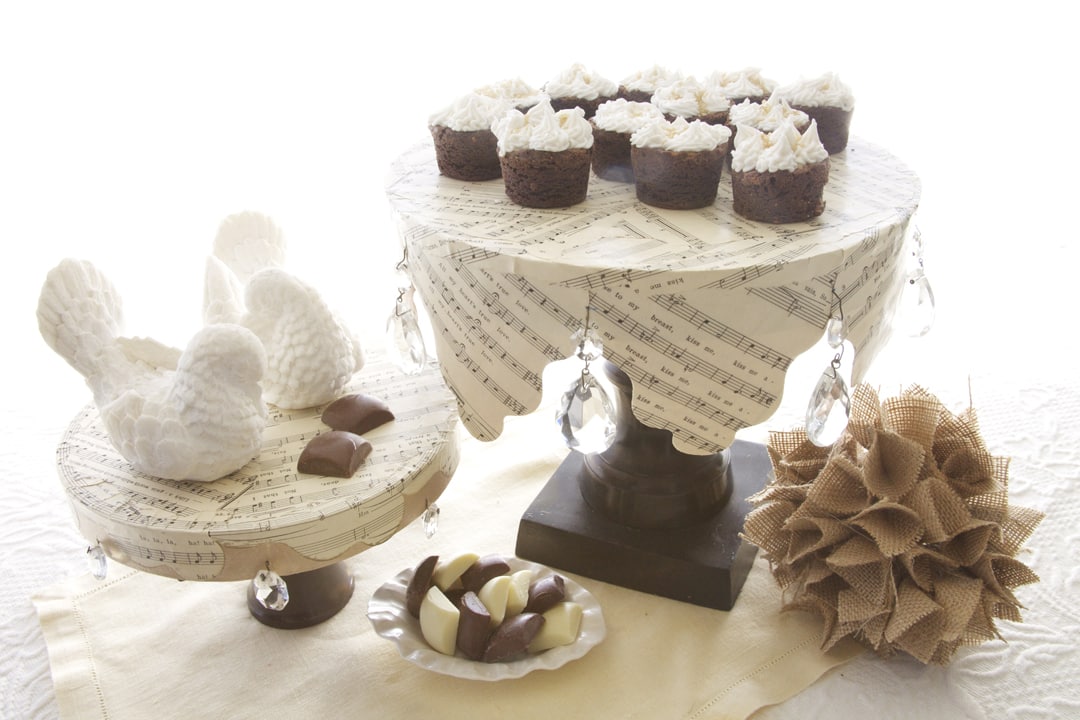
Decoupaged vintage love song sheet music creates a wavy “skirt”. Decoupage medium adds stability and shine. A swipe of a bronze stamp pad ages the edges and a bit of iridescent powder blended in the final coat of decoupage adds a touch of shimmer. Rescued chandelier prisms dangle from tiny holes punched through the lid edge.
For a tiered server, stack em!

Lotsa Dots Casual? Backyard Sweet?
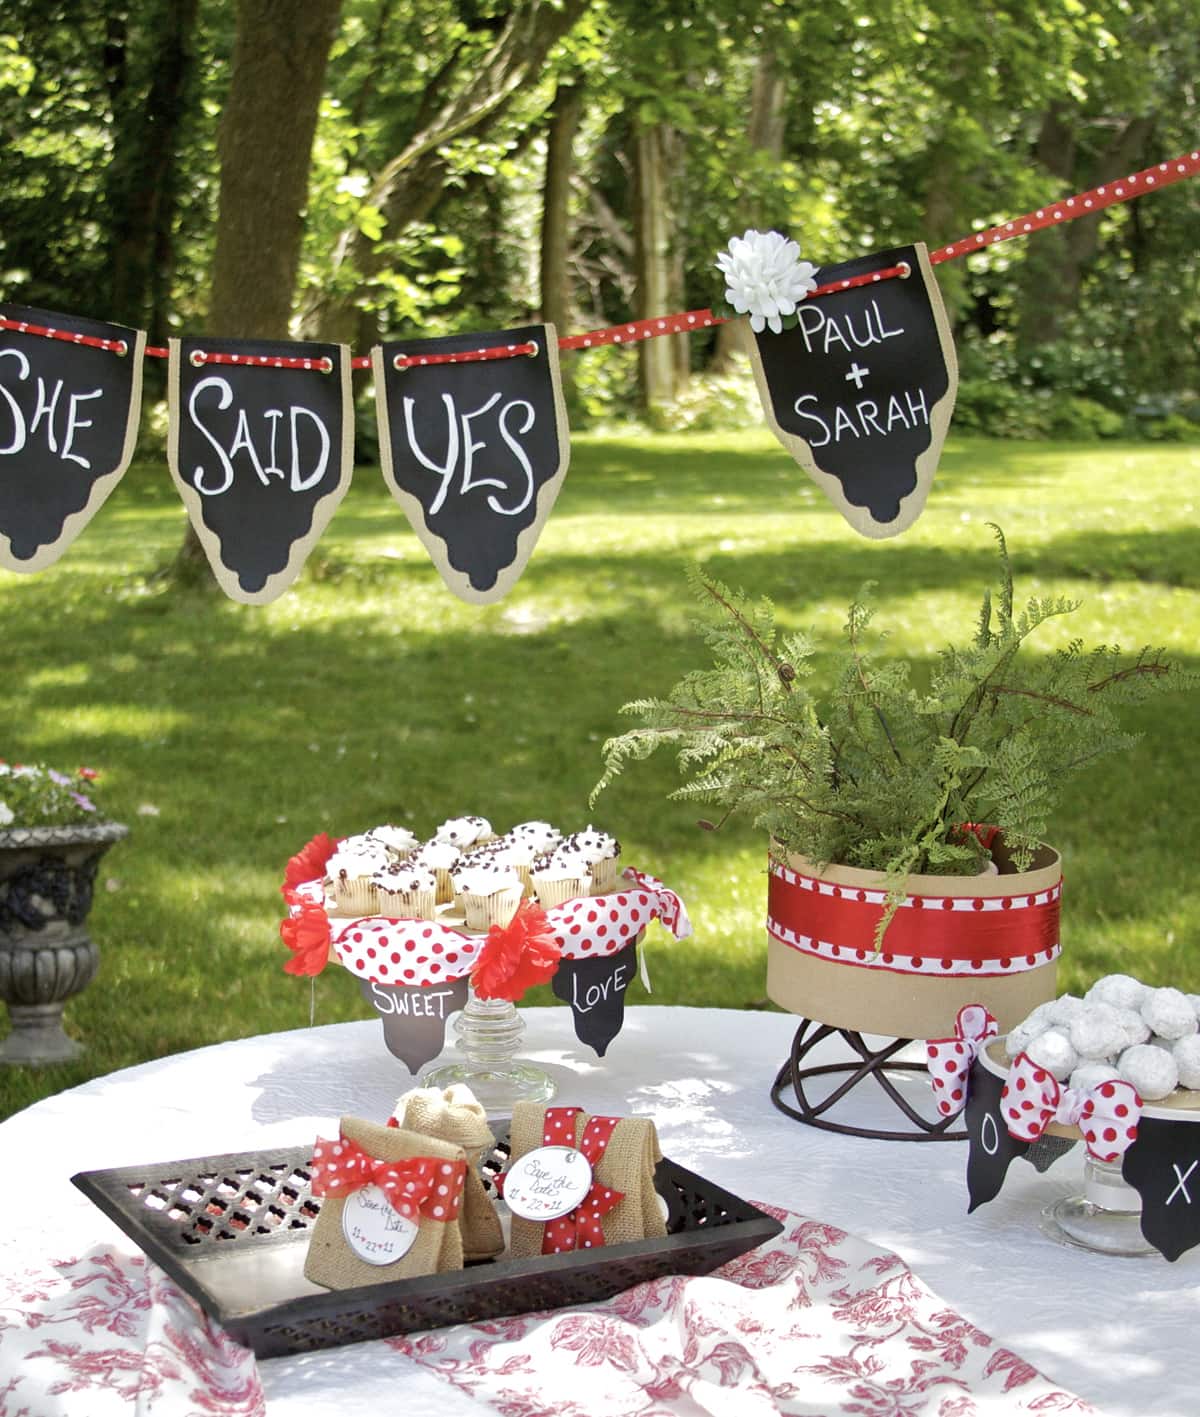
Simplest of all, wired ribbon!
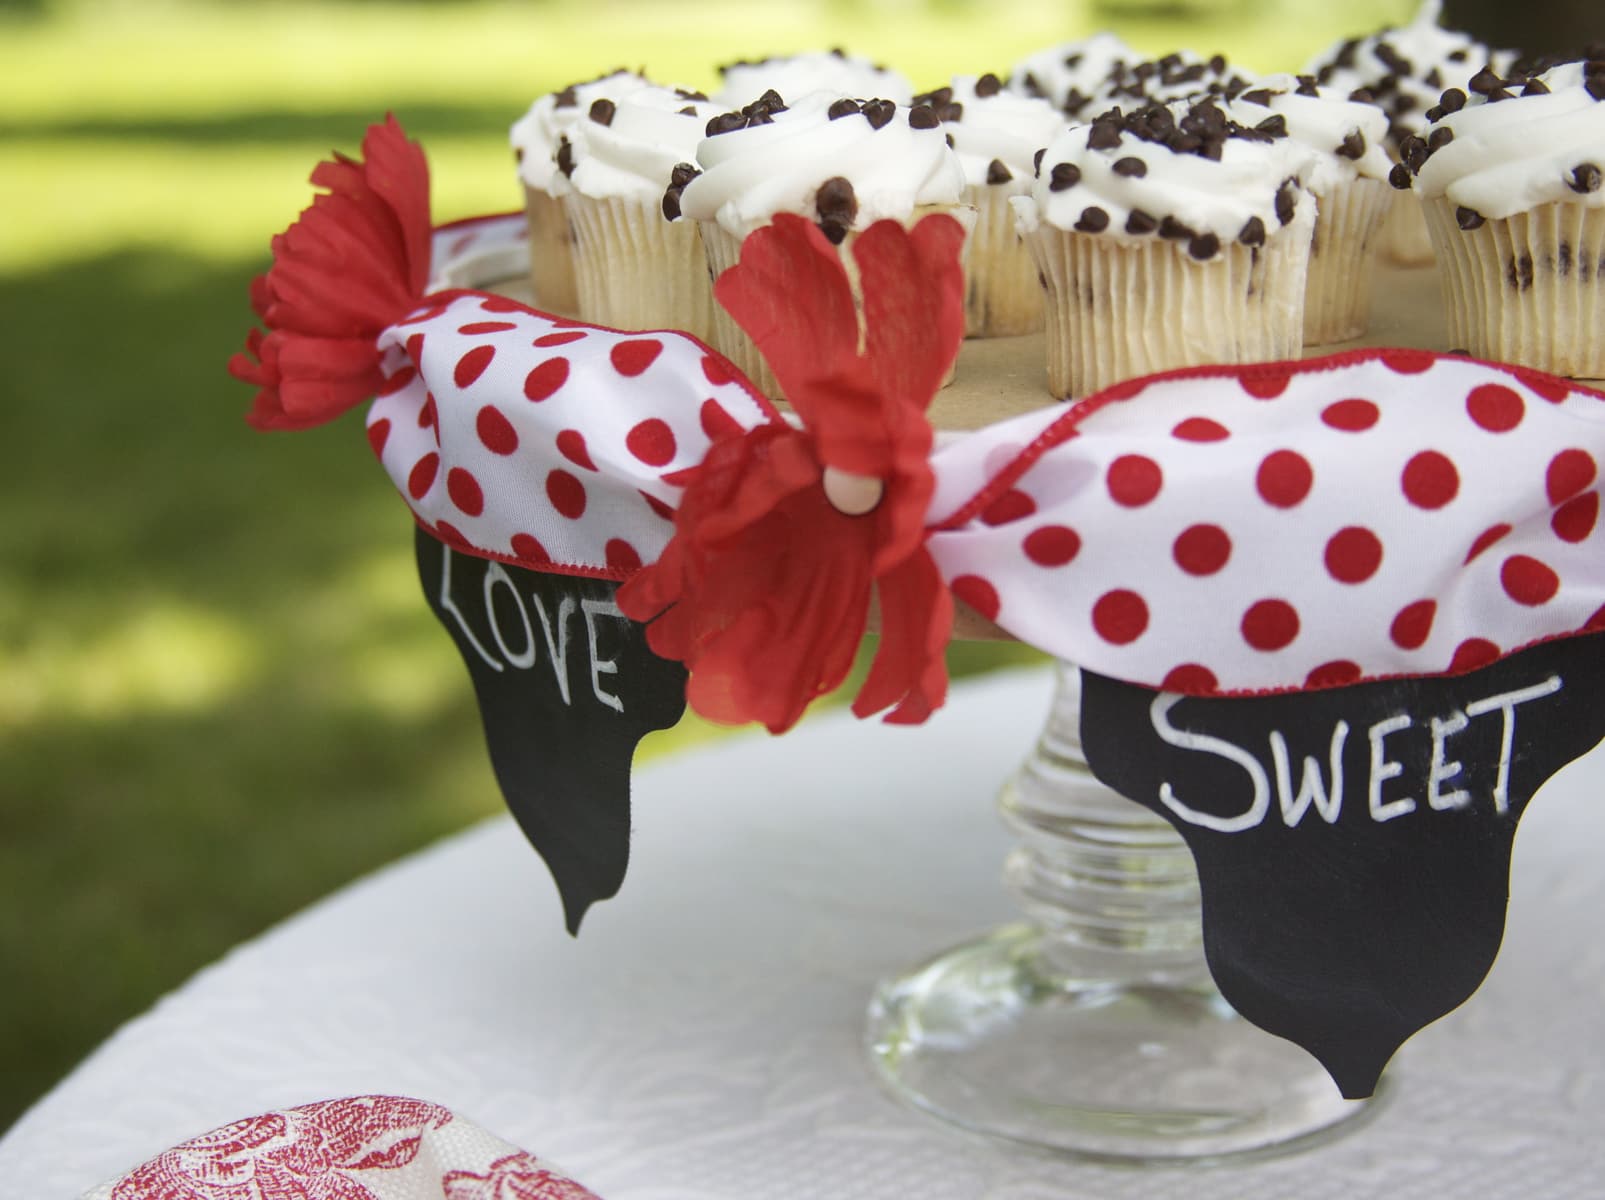
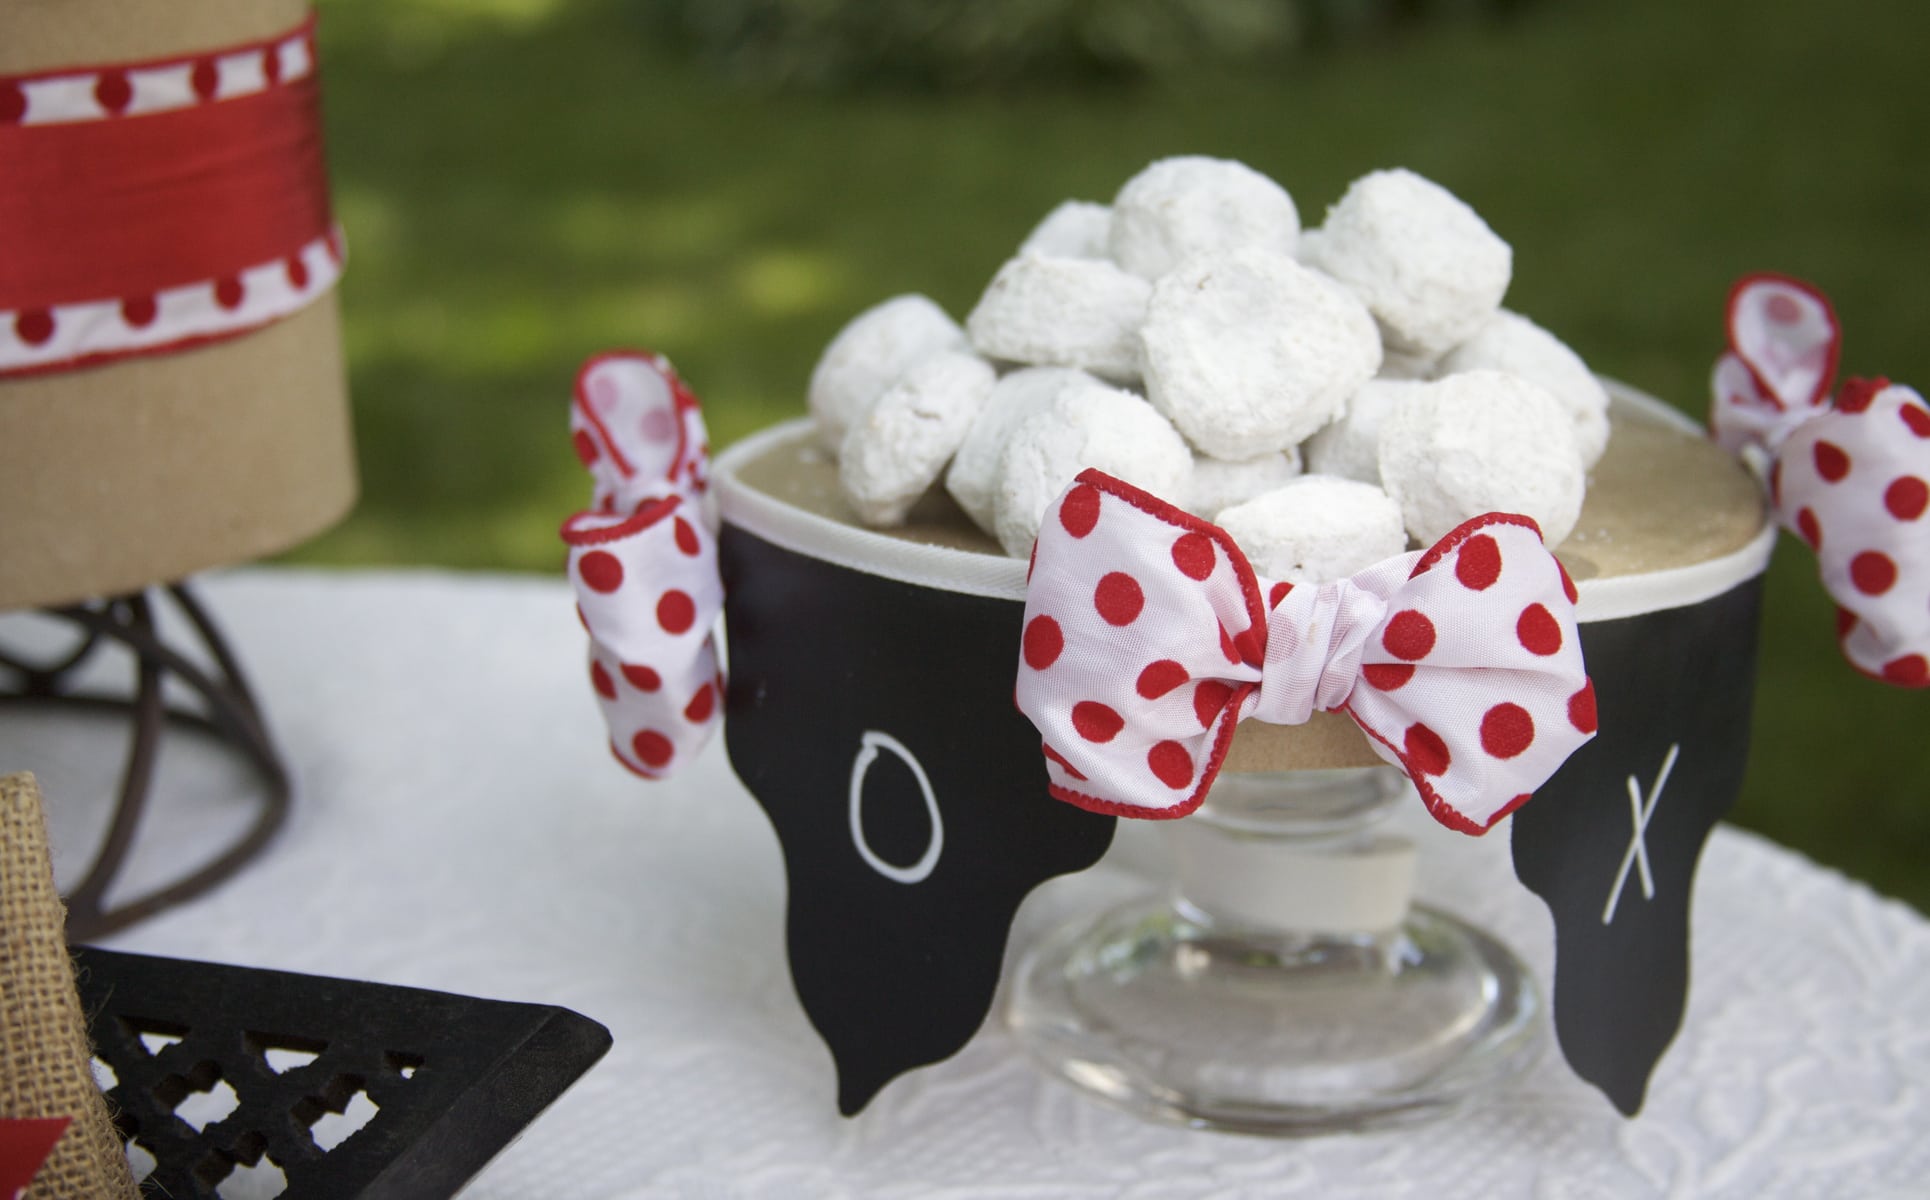
Bunch and twist along lid edge and secure a bow or silk flower with a tumbtack. Glue & tape give an extra boost of staying power. And the boxes? Let them stand duty for some greenery – or maybe to hold bundles of silverware or stacks of plates.
Fresh Prep? Sweetly Tailored? Crochet, Anyone?
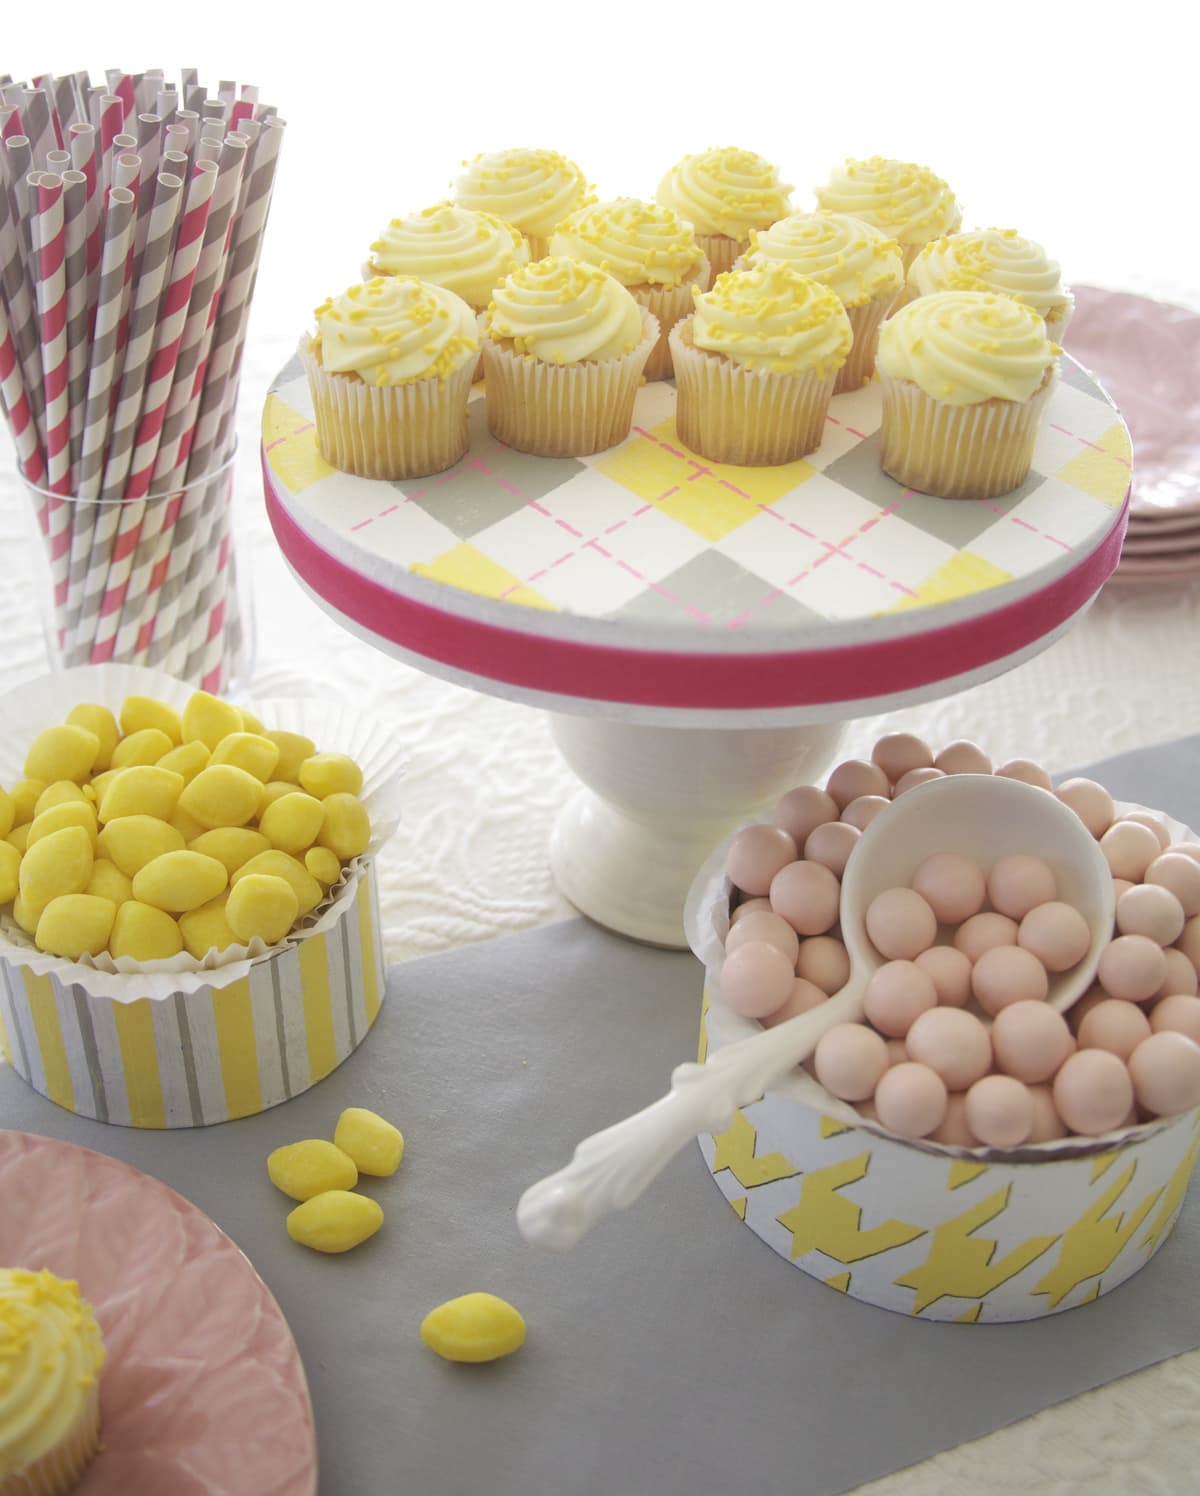
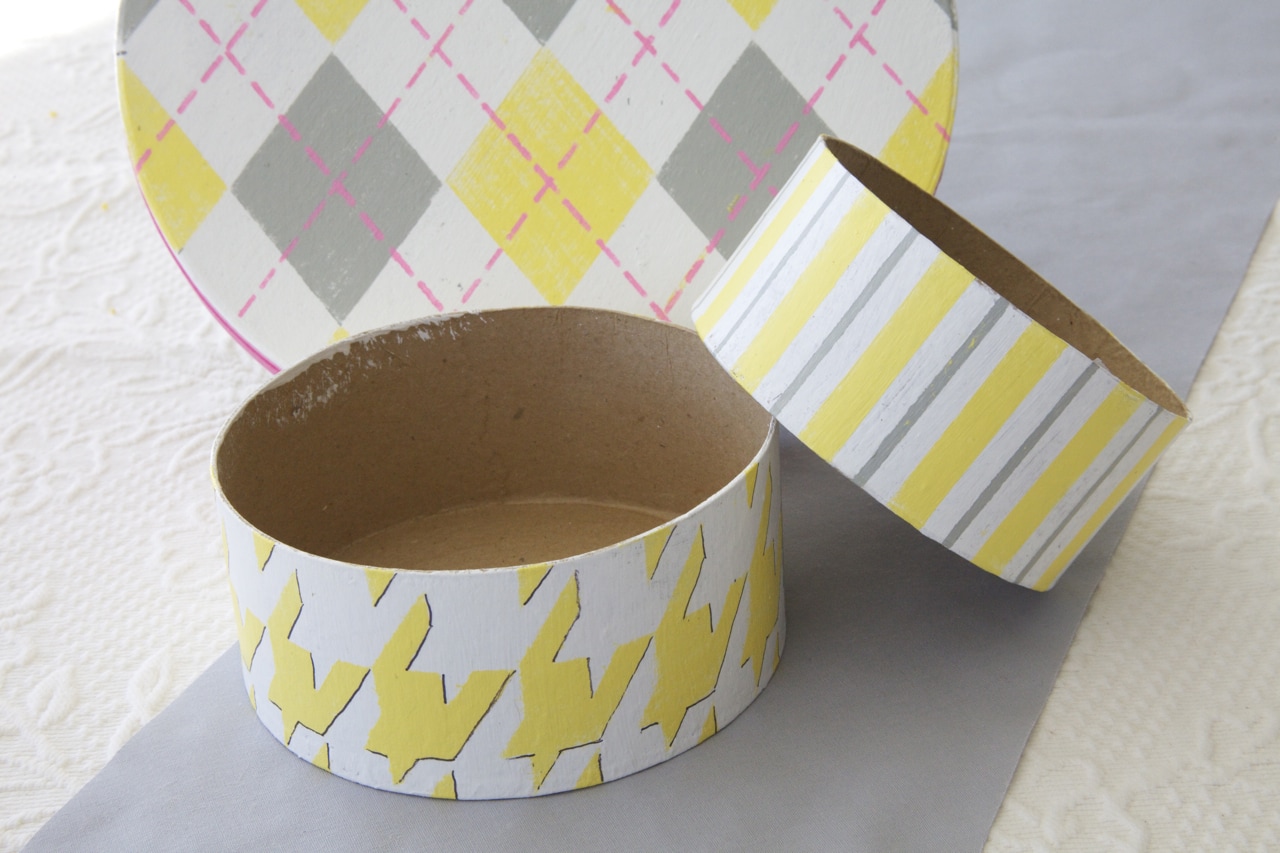
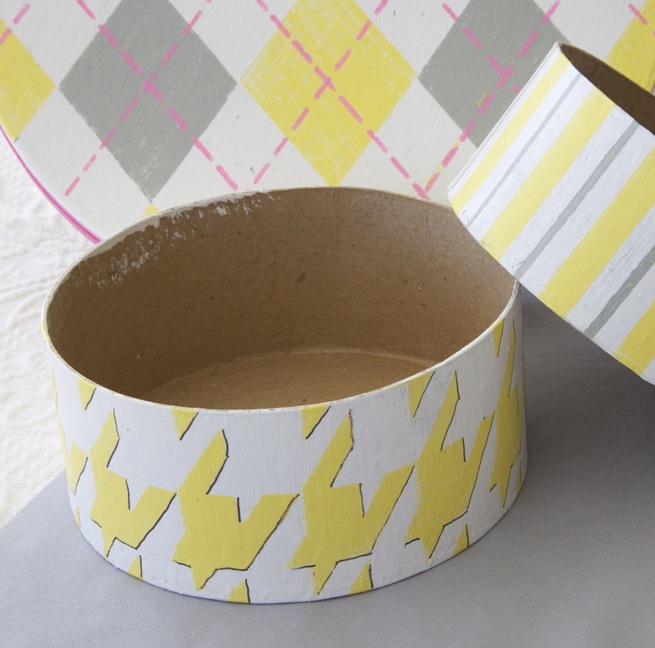
For a springtime preppy themed event, I envisioned a fresh modern approach to the classic patterns of houndstooth, argyle and pinstripe. Yellow, grey and pink brought the perfect light touch to the traditional menswear patterns.
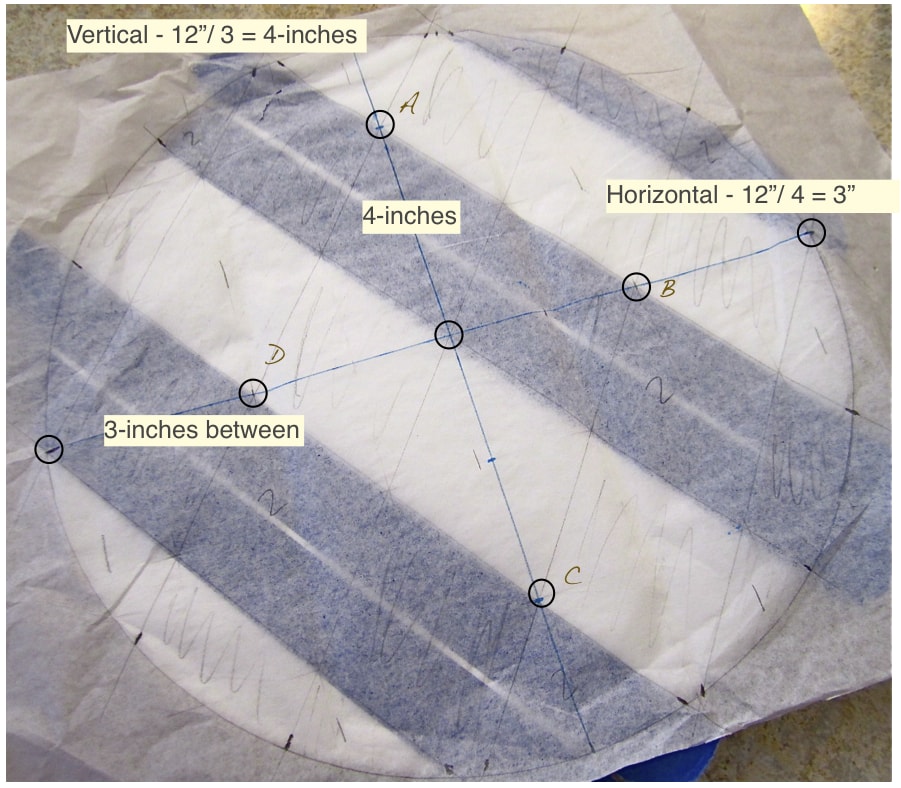
For the argyle lid, start by tracing the lid on a piece of tissue paper.
Then give the paper mache boxes and lids a base coat of white acrylic craft paint. Or if the craft paper brown fits in your color scheme, just skip this base coat.
While your base is drying, draw out your diamond pattern on your tissue paper.
1) Start by drawing vertical and horizontal centerpoint lines. They must be exactly perpendicular for the diamonds to all come out correctly. Double check by lining up the corner of a magazine, envelope, etc.
My example is a 12-inch lid and I used a 4 x 3 layout of diamonds.
On your flat work surface, NOT on the lid as my picture shows:
2) Mark Points A and C 4-inches above and below centerpoint on the vertical line, see pic.
3) Mark Points B an D 3-inches on either side of centerpoint on your horizontal line, see pic.
4) With a straight edge, draw a line from edge to edge, through points A and B, then C and D. Draw a third line that is parallel to these two that crosses the centerpoint.
5) Measure the distance between lines and draw two more lines this same distance out from your original A-B and C-D lines. [Sidenote: Don’t let the white space between the two stripes of blue tape throw you, my tape just wasn’t wide enough to cover the whole width.]
6) Repeat this same process going the other direction: Draw lines through A and D, and then through B and C. Another parallel to these through the centerpoint. And then two more equidistant outside the two original lines.
Note: if your geometry, measurements and the circular shape of the lid are all perfect, the lines will bisect each other on the outline. Ha! This is real life here! So if you’re close like mine are – you’re good! And on your way to awesome.
7) Number or mark off your diamonds in an alternating pattern to help see the layout.
8) With tissue paper on your lid, make a tiny pencil mark where each line crosses the edge. These tiny marks are where your painters tape will line up.
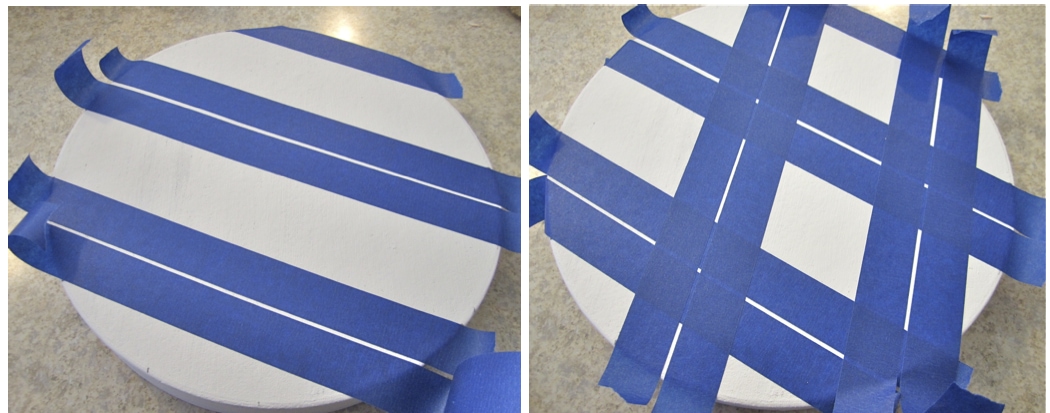
9) Break out the painter’s tape and mark off the sections following your guide sheet.
10) Paint color one, and remove painter’s tape right away. Let dry.
11) Tape again and paint color 2, removing the painter’s tape right away again. Let dry.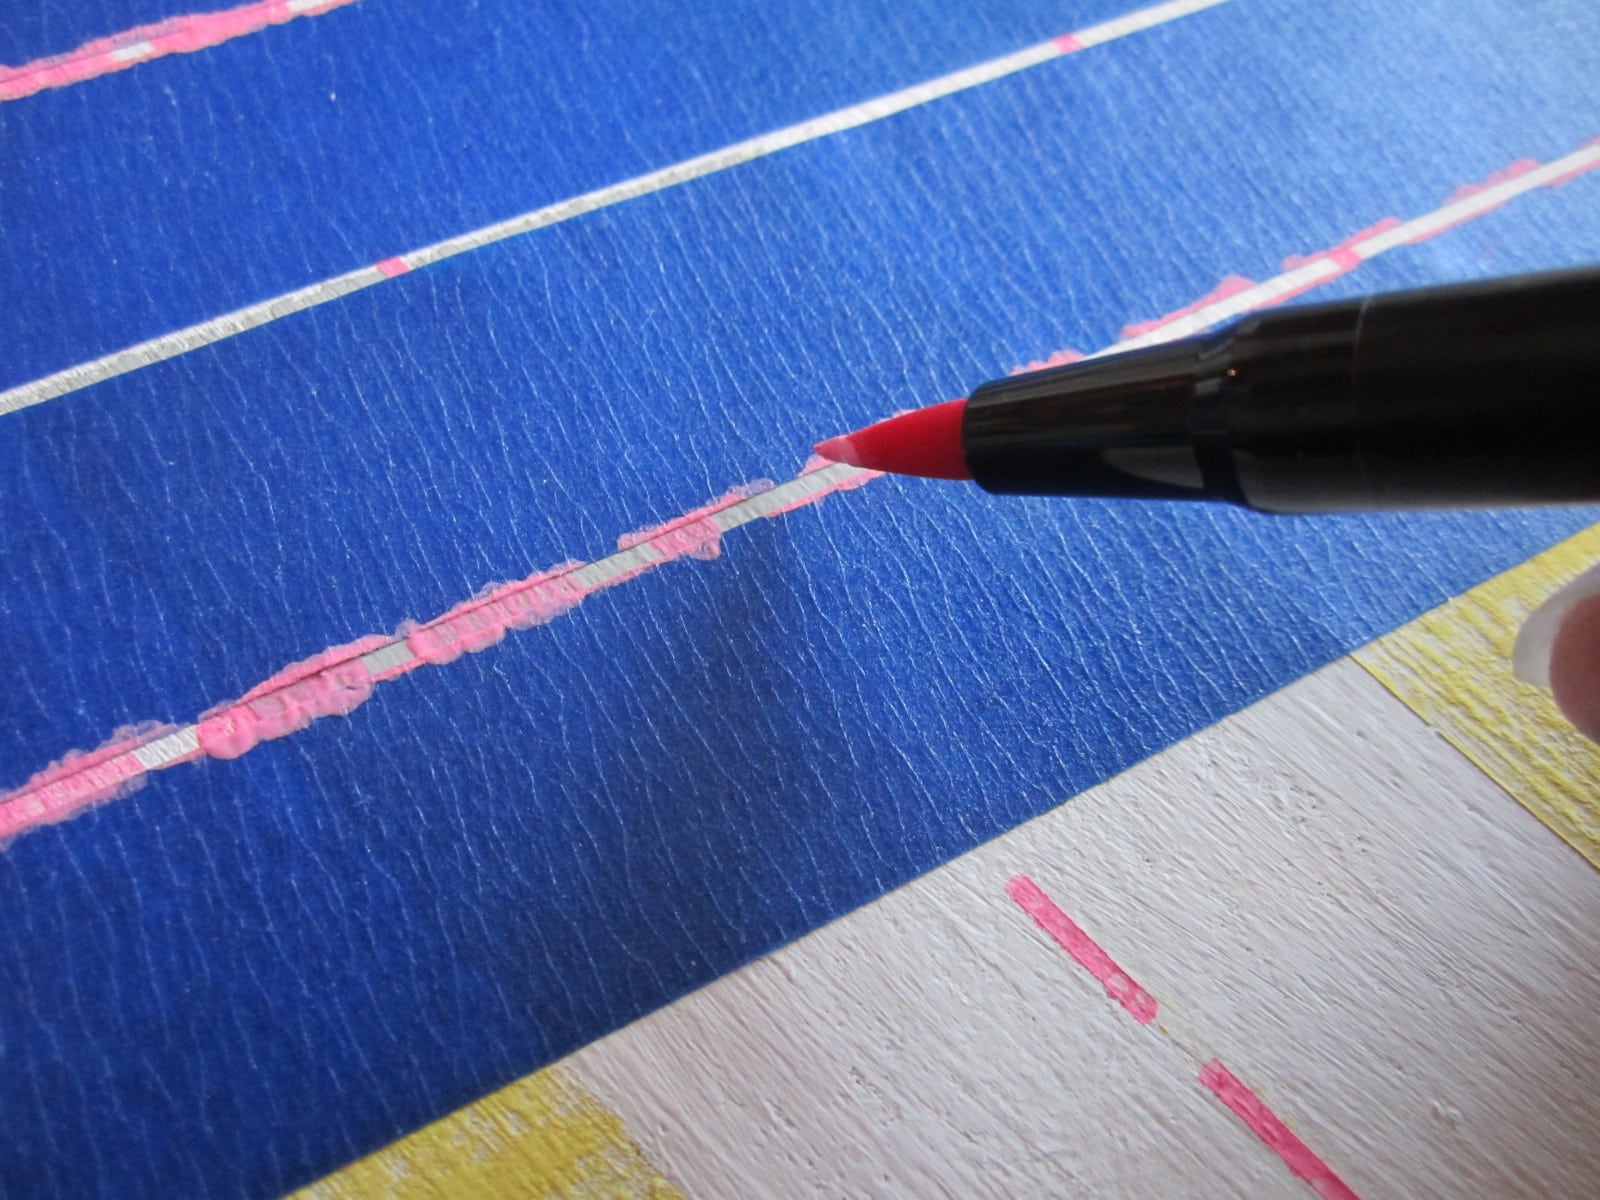
12) Final step: The dashed line that defines argyle. If you have a steady hand and a keen eye, certainly just freehand it. I have the eye, but not so much the hand, so I prefer to use two rows of painter’s tape down the center of my diamonds. Then paint my row of dashes.
For texture, I finished mine with a band of pink velvet ribbon, rather than paint.
And for the Pinstripe:
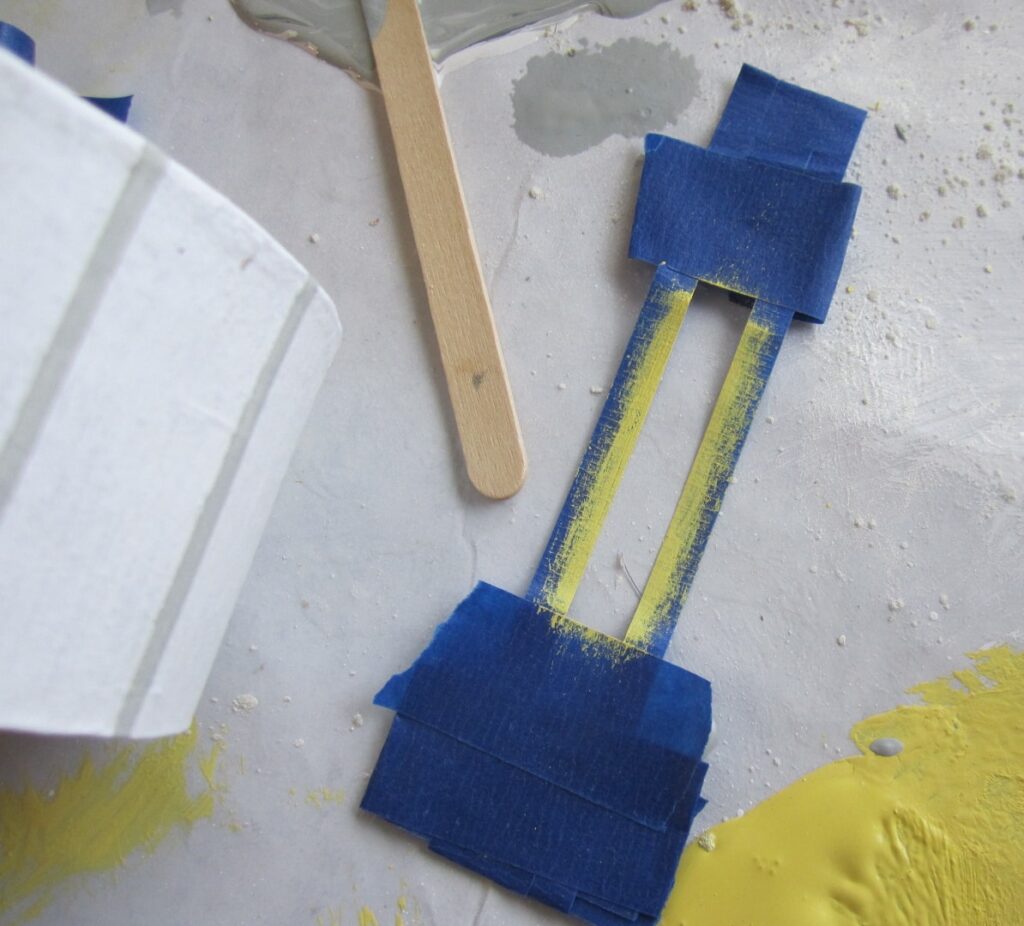
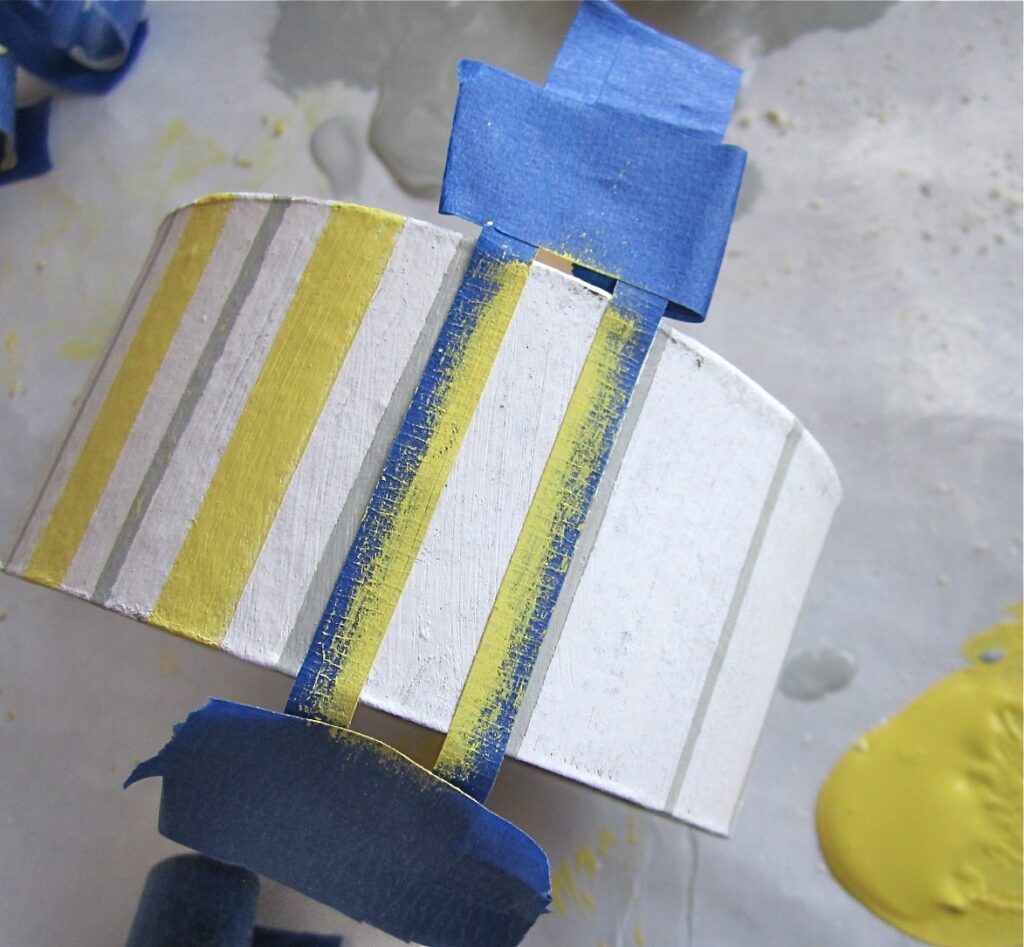
1) Create thin pinstripes by using vertical strips of painter’s tape closely spaced evenly(-ish) around a box. Paint. Remove tape and let dry.
2) Make a stencil for your wide stripe by cutting two thin strips of tape. Place them just inside two of your painted thin stripes. Make “handles” with more tape just above and below the box. These handles make it easy to lift and move your stencil between each row of stripes. Place, paint, remove with handles and move to the next stripes, place, paint, remove, place, paint, remove, …. around the box.
And for the Houndstooth:
Cut a stencil from clear plastic. Tape in place and paint with a pouncing motion. Remove stencil. Let Dry. Optionally, add a shadow with an ink pen.
[/et_pb_text][/et_pb_column][/et_pb_row][/et_pb_section]